
If you are a home brewer already I’m sure you most likely started out with an extract kit. Its easy and less expensive in starting equipment costs. But if you find you enjoy homebrewing, making the switch to all grain will save you lots of money quickly.
Switching from extract to all-grain is easy for beginners. It requires some additional equipment and time to switch to all-grain. All-grain is easy to learn but difficult to master, don’t worry about being a perfectionist on your first try. Follow simple recipes and learn the basics.
In order for beginners to start brewing all grain, you will need to set expectations since many of the first beers you brew will be experiments. It’s also best to stick to the easiest beers since mashing (extracting sugars from grain) can get extremely difficult with advanced ingredients.
Is All-Grain Worth the Switch?
You may have heard that all grain brewing gives you more control of your beer. This is absolutely true, you can play with the grain bill and get different flavors out of your beer.
This is probably the number one reason you will want to switch to all-grain and the biggest reason to switch before you begin brewing more batches.
All-Grain Brewing is Cheaper
This may be the second reason you have thought about switching to all-grain brewing. You may have heard tons of info about how its worth it because you save money in the long run and while this may be true, there are a few caveats.
First you will have to purchase new all-grain equipment. This is not cheap. This makes it more expensive initially to begin brewing all-grain.
The second caveat would be how you purchase grain. If you are not getting bulk discounts on your base grain then you are essentially paying the same exact price to brew an all-grain beer than you are when you are buying an extract recipe kit.
So, don’t make the switch to all-grain unless you are getting good deals on grain. Pay close attention to bulk grain prices, you can begin to recoup the costs of the equipment purchased to begin brewing all grain.
I suggest buying your base grain build online either from MoreBeer or Northern Brewer. You can check out my recommended products page for more info.
Easiest All-Grain Type of Beer to Make
Easy is a relative term, since you can make any beer more difficult by adding to the complexities. However, when it comes down to it, Ales are the easiest type of beer to make.
Why Ale and Not Lager?
I know it might sound a bit boring to start out with a standard ale, but in reality you can make a multitude of different styles of ale. The reason ales are so numerous and easier to make is because they are top fermented.
Top fermentation differs from a lager, since the yeast required works best at a temperature range of around 70F. So potentially you won’t need a chest fridge to regulate temperature.
In reality a lager would be easy to go all-grain if it were not for its difficult fermentation process, but brewing an all-grain really isn’t much different.
The beginner difficulty level really comes in when you look at the overall complexity of a grain bill.
Some classic ale styles that you can choose from on your first all-grain beer include:
- Amber Ale
- Brown Ale
- Pale Ale
- Porter
- Belgian Tripel
The grain bill on the above beers can be pretty clean and simple. All you really need is a base malt and maybe one or two specialty malts for flavor. But, for some beers you could get away with just the base malt!
If you are interested in building your own Belgian Tripel recipe I wrote an article on that and you can read through it to get started on your first all-grain Belgian Tripel.
Not all recipe’s are easy to get through, but some notable mentions are India Pale Ale and Hefeweizen, since they are both ales, however there are some aspects that make them more difficult to brew.
India Pale Ale
India Pale Ale has a very heavy grain bill which can get expensive real fast. I would not suggest starting out with it since failure could cost you a decent amount of money. IPA’s also have some tricky hop additions which can make it more difficult to brew as well.
If you love brewing Double IPA’s all-grain brewing could recoup equipment costs the fastest.
Single hop or single malt makes IPA’s much easier to brew. However the shear amount of grain you use will make it more expensive, so if you are afraid of failure, pick a less expensive beer on your first try.
Hefeweizen
Hefeweizen is actually a complex beer when it comes to the grain bill. I would not suggest making one on your first try since half of the grain is wheat, and wheat is trickier to lauter (name of full grain sugar extraction process) than just straight barley.
A lot of Hefeweizen recipes are also highly customized so sticking to a basic recipe can be hard, and when you are excited about creating a peach beer, there is a lot more to think about.
Be careful, some Hefeweizen recipes use step mashing. This is where the temperature of the mash changes to extract different flavors. So if you choose to do a Hefeweizen be aware of this added complexity.
Lovibond and Maltiness a Spectrum of Difficulty
What is a lovibond? Well it essentially refers to the color of the malted barley that you will be using in the beer. The more roasted a barley is the darker the color and the higher the lovibond.
The lovibond is the number next to the L in the name of the malt that you are looking to purchase. Its generally included with specialty malts, and the higher the number the darker the roast.
Darker Ale
Creating an all grain beer that has a higher lovibond can be a good way to go with your first all grain, since its very forgiving when it comes to hiding any issues you had during the lautering process.
This is why a porter or a brown ale can be a great first choice. Also if you mess up on either of these beers you can always use them to cook beer brauts or something.
Lighter Ale
Some lighter ales like a pale ale or a Belgian tripel can come with a few problems. While their grain bills can be simple, their lighter flavor can make it difficult to hide some potential issues.
- Water Profile: If you don’t have access to quality water this could be a problem. Tap water is not so great when it comes to making light beers since the off flavors from flourine and chlorine could pose a problem.
- Sparging Mistake: While the exact cause is highly debated, there is potential for tannin’s to leach into your wort and cause off flavors in your beer. Having a lighter beer makes it difficult to mask these tannin’s.
More Difficult All Grain Recipes
As a caveat to the above styles any of them can become more difficult. The more grain variety that you add can increase the difficulty. There are also different processes that can be done during the mash that can create a higher level of difficulty.
When in Doubt Single Infusion Mash
Single infusion mash is when you are pouring your heated water into the grains one time and keeping it at that specific temperature through the entire mash. If you are a beginner all-grain homebrewer this is what you will want to do.
Do not step mash on your first all-grain, the added complexity increases the likelihood of mistakes.
All-Grain Equipment and Process
There are two methods of all grain brewing. One of them is more popular among homebrewers, but the other is gaining in popularity.
Sparging and brew in a bag are two popular and independent all grain brewing methods.
Sparging is typically what homebrewers have been doing, for a long time now. This requires a mash tun in order to soak your grains in hot water to extract the sugars. The other method is brew in a bag, which essentially is what commercial breweries do.
Sparge Method and Equipment
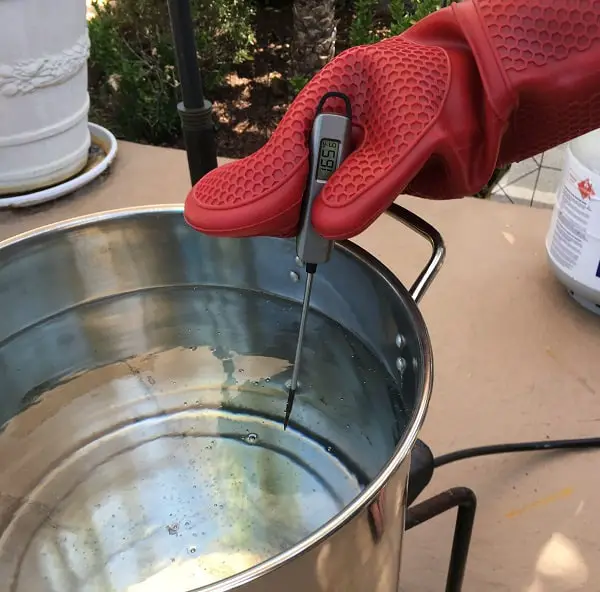
Both Sparging and brew in a bag both require mashing. This means the grains will need to soak at a temperature range of 148-156. This will need to be done for an hour, but once complete the methods diverge.
Sparging requires extra water to rinse through the grains in order to get the rest of the sugars out. The strike temperature of the water should sit around 170F since when added to the mash it will cool considerably.
Insulated Mash Tun
The process of sparging requires you buy a mash tun which is insulate to retain the heat while the grains are in mash. This is completely separate from what you will be boiling in so again you will need to transfer to the pot that you will be brewing in.
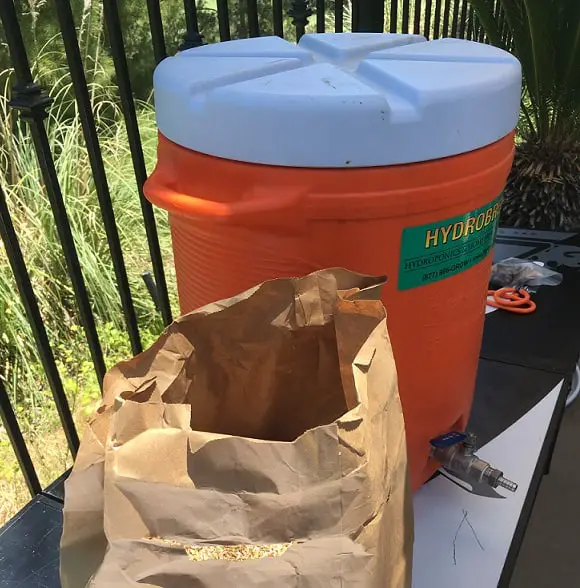
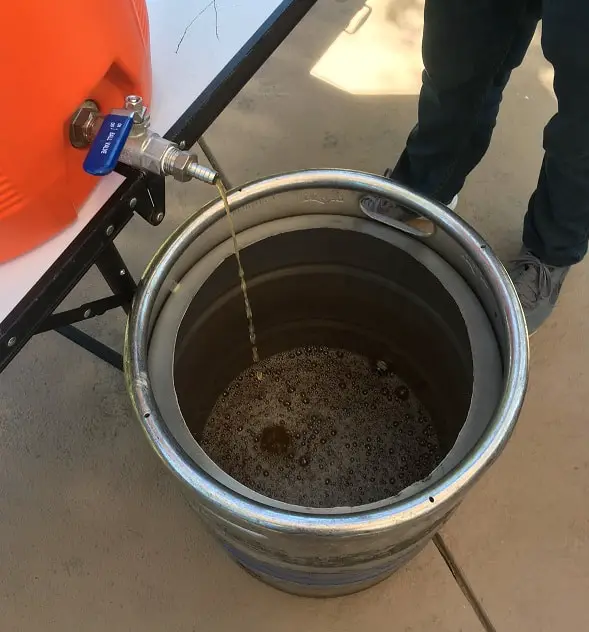
You will need this seperate vessel with a spout and a false bottom inside. The reason for this is you will need to transfer to either a keggle or a large 10 gallon kettle to boil in.
Bigger Brew Pot
You will likely need a larger brew pot in order to hold the larger amount of wort that you will have. This is different from extract, since extract is more condensed. Typically a 10 gallon kettle is recommended although you may be able to get away with something smaller.
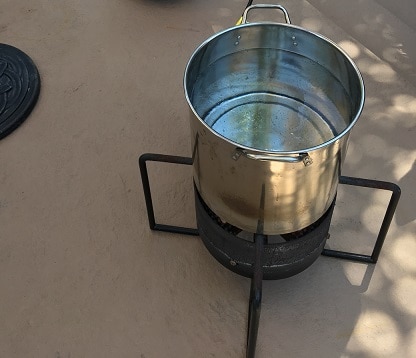
Sparge Water and Pot
Separate from the kettle (or keggle) that will boil the wort, you will need another kettle to heat sparge water. This pot will need to be separate since the water will need to be held in this pot and flow into the mash tun as you are sparging the wort into the larger kettle.
The Redneck Sparge Arm
Because we believe in saving money, by not purchasing expensive unnecessary items, we devised a way to disperse the water when sparging.
The reason you want to disperse the water is so that it collects on top of the grains and slowly moves down to the bottom collecting more sugars along the way.
Calculate Water Needs
I forgot to tell you about water, obviously with all this sparging and boiling you will need more than 5 gallons of water.
In order to figure out your water needs I like to utilize this simple calculator.
Vorlauf a Fancy Name for a Simple Process
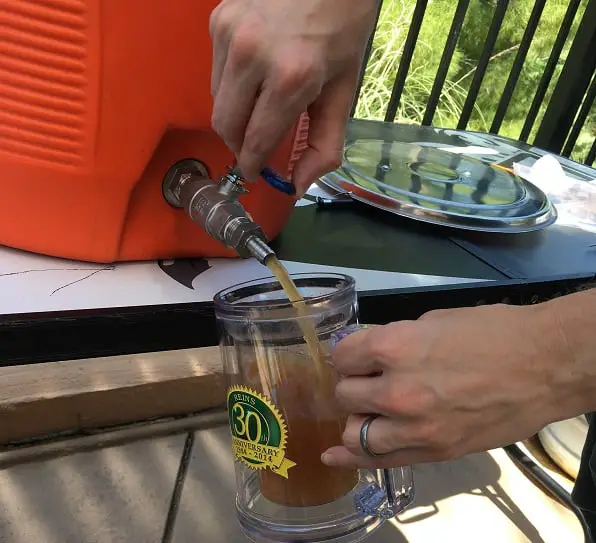
Before you transfer the wort to the kettle for boiling you will need to Vorlauf. This just means you pour wort into a cup and put it back at the top of of the mash.
The reason this is important is you will get a lot of the small grains out and clear up the wort. You don’t want those grains in your boil, or in your carboy when you begin fermenting.
Doing the Vorlauf will clear up the wort.
Begin the Boil as Normal
After the wort has been transferred to the boiling kettle, you will need to boil as usual. There is nothing different at this point than a non all-grain brew method.
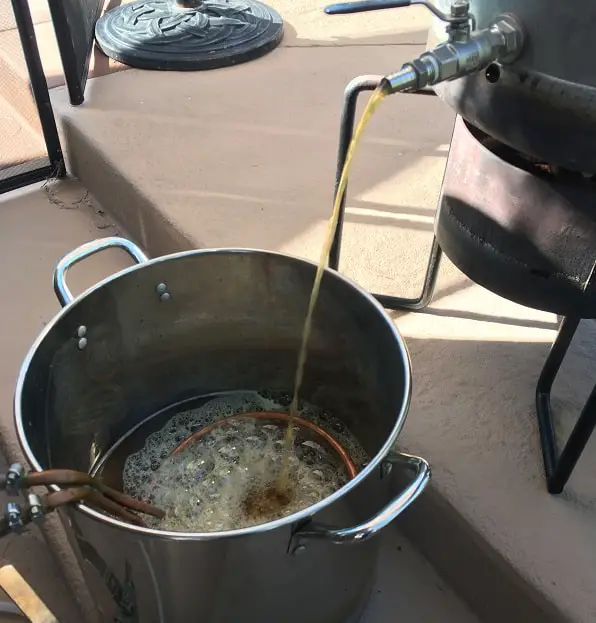
Kettle Transfer Suggestion but not Necessary
The only difference that we have post boil from a normal extract, or even other style of all-grain brew is we transfer it from the keggle to a kettle post boil in order to cool more efficiently.
That’s all there is to it when it comes to brewing an all-grain using a fly sparge method of brewing. This is generally the best way to brew all-grain if you are looking for higher levels of efficiency.
The higher efficiency will grab more sugars to be fermented by the yeast. It is also a good method to use if you are just adding onto a system you already have since you can utilize the kettles used in extract brewing.
However, if you are just starting out and want to jump into all grain or achieve more consistency you could jump straight to a brew in a bag all in one system. I’ll explain more below.
Brew in a Bag Method
Brew in a bag is aptly named for how brewers have used a mesh bag to hold their milled grains and then have it sit in hot water for an hour. After the hour they then remove the bag from the pot that they are going to boil in.
At this point the wort drains from the bag, or other container you will need to wait until there is no more wort draining to your boiling vessel.
Brew in a bag could increase consistency since there is less transferring and parts associated with it.
This method saves a ton of time in transferring and takes away from the time spent doing the sparge. Some of the disadvantages of this method include less efficiency since you are unable to rinse or add more water.
It may also be more difficult for massive grain bills, since most systems only have 10 gallon kettles.
Brew in a Bag Systems
I admit I am a newb when it comes to brew in a bag, since I have never actually done it myself. However, there are some amazing systems that you can buy that will easily speed up your brew day and consistency.
The Clawhammer system is a brew in a bag system that you can buy to start brewing all-grain recipes from the get go. You can check out some of my thoughts on it on my recommended products page.
Since I haven’t used it I’ll let the Clawhammer team tell you about it in this YouTube video.
All About Grain (Grain Bill Tips)
A grain bill is the combination of different grain ingredients that you will be using in the lautering process. While most grain bills will consist mainly of barley, there are some adjuncts that can be added to achieve different end results, more on that later.
Base Grain
Typically your base grain will be the majority of grain used. This grain is best used to balance the beer profile and will change depending on the style of ale you are brewing.
In my wheat beer recipe build I talk about different types of base malts that are utilized in the style. Typically for wheat beer styles you will want a light Pilsner malt.
In the United States a very common base malt is American 2-row.
Specialty Malt and Adjuncts
Apart from the base grain you can get more complicated by adding various specialty malts or adjuncts. These will add flavor and depending on how dark or roasted specialty malts are, the sweeter the taste will get.
Adjuncts can be described as any ingredient that is not barely. These are typically used to achieve a different mouthfeel, flavor profile or even aid in head retention.
Adjunct Examples:
- Oats
- Wheat
- Rice or rice hulls
- Pumpkin
One example of an interesting use of adjuncts to create a creamy mouthfeel are oats and wheat. This is what gives NEIPA or New England IPAs their distinct characteristic. I talk about this more on my building a NEIPA recipe.
Measuring PH for Advanced All-Grain Brewers
ADDing acid and measuring your PH? I mean you could get crazy technical with this but I feel this is more for the advanced, My buddy and I have never actually worried about this and brewed beer just fine. Its something you can learn as you go.
You will need some additional tools in order to measure the PH, and can typically balance it with water and acids.
Tips on Storing Grains
Crushed grains go bad in weeks, make sure you are brewing right after you crush your grains. Otherwise you can store your grain for years. Make sure to purchase bulk bags of your base malt.
Disturbing the Mash
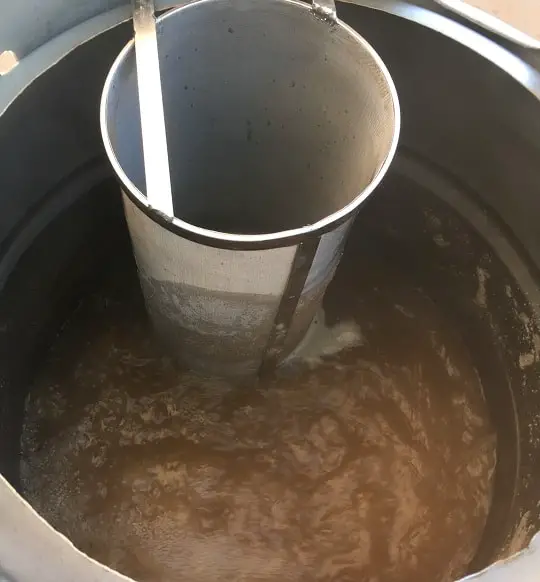
Mashing is when the crushed grain is sitting in the warmed water extracting the sugars. It is part of the overall lautering process. There are a few things to be aware of when you are mashing and then beginning to sparge.
Disturbing the grain in the mash? This essentially means if you are touching or moving the crushed grains in any way as you are extracting the sugars.
There is a big debate on whether or not you should disturb the grain or not.
To be honest this might just be an urban legend, there is a lot of talk about tannins getting into your beer, but I think this is more from temperature than moving grains around.
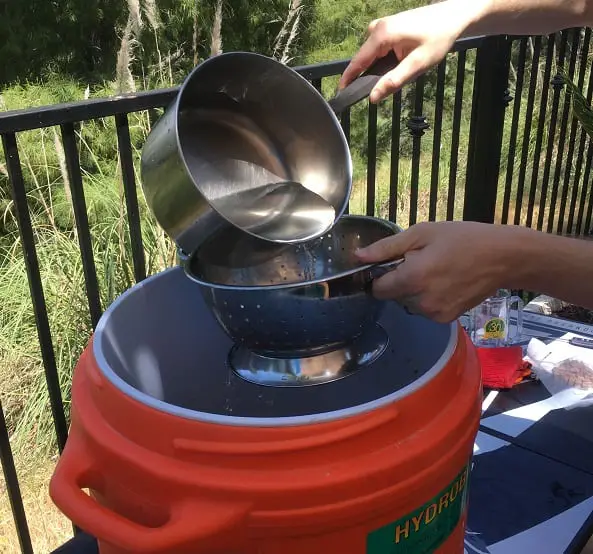
Not disturbing the grain is more for being able to extract as much sugar as possible. There are special attachments for specific setups that you can buy that areate the sparging liquid as it cycles.
I talked above about using a colander to spread the water around, so it wont go directly to the bottom.
Mashing Temperature Range
Homebrew supply does a great job of explaining temperature, but essentially you need to keep within the range of 146-156.
The lower end of the temperature will create a drier beer and the higher end will make a sweeter full bodied beer. If you are making a Belgian you might want it on the lower end and a NEIPA at the higher end.
All Grain Mash and Sparge Length
There are a lot of people who say to mash for 90 minutes. I think this is likely to get higher efficiency and gravity, since you are essentially extracting the most sugar from the grains.
I’m more on the side of just Mashing for 60 minutes then sparging for as long as it takes to hit your water level according to the calculator i linked to above.
The added time sink does not really increase your efficiency enough to warrant the extra time, plus you are using more water in the process, which depending on what type of water you are using, could become more expensive.
Recipes to Try
When you are ready to take the leap to all-grain you can check out the exact equipment I use for the sparge method.
Make sure to check back here regularly as I add more recipe builds to the site. Remember to start simple with your grain base and move up from there.
You can access the recipe builds from the home page by clicking on the recipe build navbar.