
When it comes to brewing beer at home it can be a bit intimidating. There are a lot of variables. Then you need equipment, ingredients and instructions! Its all so overwhelming.
You don’t need a kit to brew beer at home. You can brew easy and cheaply by sourcing your own equipment and ingredients. However, it can become time intensive and expensive to get ingredients yourself. The cheapest way to brew beer without a kit is to brew small 1 gallon batches.
Below I’ll help you navigate the the beer making process without dropping mad cash on a kit.
I will add one caveat though, its much easier to make a gallon of beer than it is to make 5 gallons. The equipment is also easier to handle and you won’t spend a fortune in time and money to cool the wort down.
Brewing Beer at Home For Less
When it comes to brewing beer often people turn to kits, but I’m here to tell you, while kits can make things easier, you can brew beer at home with just a bit of ingenuity and less cash.
Now, when it comes to brewing beer at home I’m going to have to rely on you possessing at least some minimal but common everyday kitchen supplies and recyclables.
Common Kitchen Equipment You May Already Have
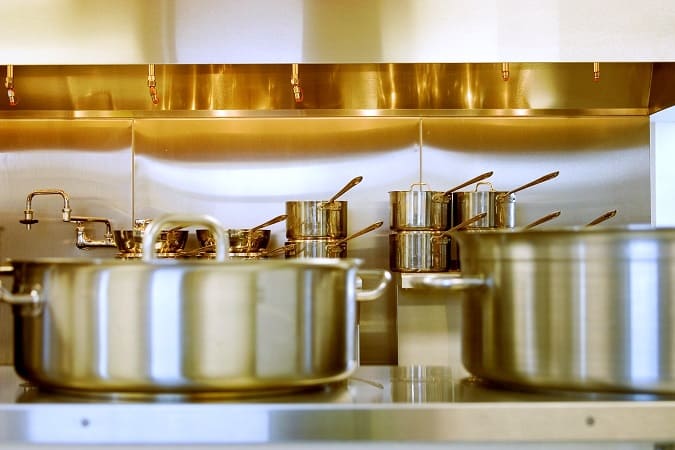
- A Pot that can Hold at least 2 gallons of liquid.
- A funnel for pouring liquid.
- Leftover beer bottles
- Large Stirring Spoon
- Dish Soap
- Thermometer
Pot size and brewing
There are some tricks when it comes to brewing a larger quantity of beer, and that’s using multiple pots. But since we are aiming to cool the beer in a reasonable amount of time, with limited space, we are going to brew 1 gallon.
The reason you need a pot that can hold about 2 gallons of liquid is that it is much easier to fit the mesh bag you will need filled with grain in it. Otherwise you will experience overflow.
You could hack this with a smaller pot by dividing your boil and ingredients and then combining it at the end.
Method of Brewing
The method of which we are going to homebrew, is the brew in the bag method. But, at these low quantities of grain, you could opt for DME or LME.
These stand for liquid malt extract and dry malt extract. It really depends on if you can find a good deal on these, one that is cheaper than sourcing the actual grains.
The Funnel
Because we are using a 1 gallon glass carboy, we will need a funnel in order to get the wort into the carboy.
Alternatively you could just use a bucket with a seal-able top, but these sometimes leak and if its not brewer grade could be poor quality and honestly brewing in a plastic bucket used for anything else is prone to infection.
The infection will come from tiny grooves and cracks in the plastic bucket, that you may not see.
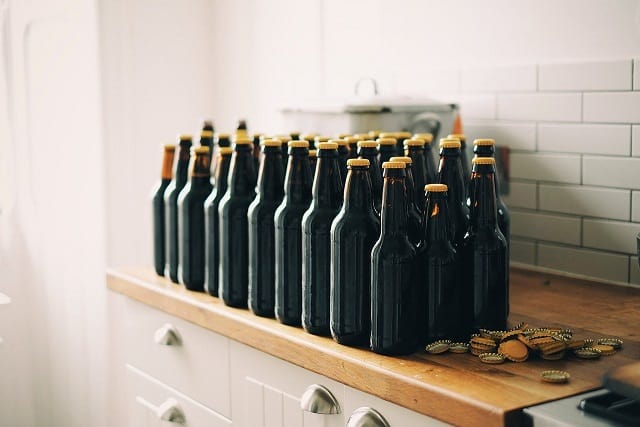
Leftover Beer Bottles
Now I’m assuming since you want to brew beer you like to drink it, so go ahead and save those bottles you are going to need them.
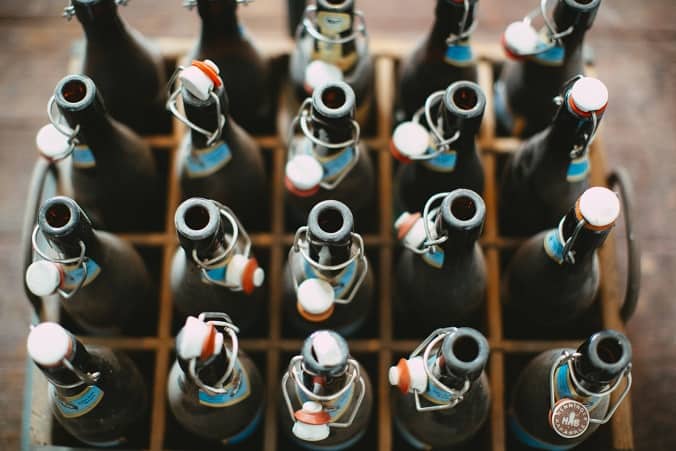
Now its much more rare but if you can get your hands on some swing top bottles this will save you from having to purchase a bottle capper and bottle caps.
Large Stirring Spoon
This is pretty important, you will need this to stir the wort as you drop in the hops during the boil.
Or if you go with the DME or LME method it is necessary to keep stirring to prevent scorching.
Dish Soap for Cleaning
One quote comes to mind when it comes to being a brewer.
Being a beer brewer is just being a glorified Janitor.
Random Homebrewer
So if there is one thing you are going to need its a cleaning solution. The cheapest you can find, is probably the one you often use at your house.
While this is a perfectly acceptable way of cleaning your equipment before and after use its not the best way.
You see dish soap leaves a residue that can affect your beer so you will need to make absolutely sure that you rinse your equipment thoroughly with hot water. If you don’t it could affect the head retention of your brew.
An alternative is to buy Star San. The cheapest I could find was this small bottle off Amazon. But again it costs money so maybe we should skip it?
Thermometer
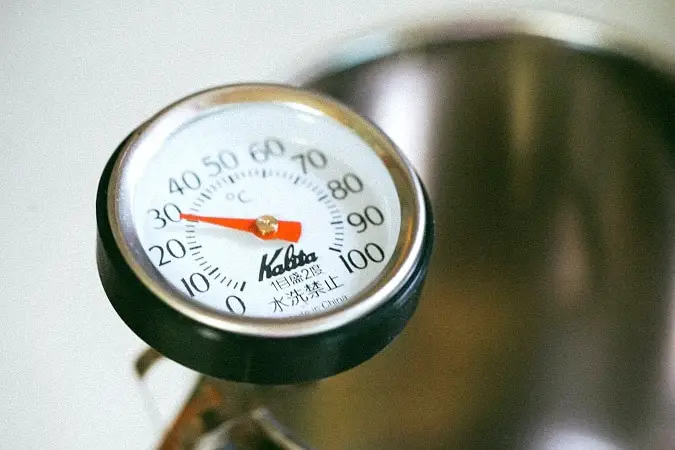
You could get by without this but its sort of annoying and requires a lot of guess work. Plus you want to cool wort as fast as possible to make sure it doesn’t get infected.
So having a thermometer to know when the wort is cool enough to pitch yeast is essential. It needs to be at around 80 Fahrenheit before you should even consider tossing the yeast into your carboy.
Check out my equipment guide to see what nice to have items are not typically included in kits.
Equipment You May Need to Purchase
There are also some pieces of equipment that you will likely not be able to get around, but you can get them for pretty cheap if not free.
- A mesh bag for holding grain.
- Hydrometer for calculating starting and final gravity.
- Fermentation glass carboy
- Bottle caps and capper
- Airlock and Bung
- Bottling Wand
A Mesh bag for Holding Grain
you are going to need this unless you decide to do straight DME or LME without the use of any specialty grains.
I warn you though it will probably taste like crap without specialty grains so go ahead and just use a mesh bag. Its around 10 bucks on amazon for more than one bag.
You might be able to get away with using a cheese cloth, although I have not tried it.
Or… Maybe you like to make your own tea if you have one of those lying around you could use that.
Hydrometer for Gravity Calculations
If you are really on a budget and don’t care not knowing the exact alcohol content of your beer, you can go without getting a hydrometer. I mean they are expensive anyways right?
You can also get a general idea of what the alcohol content of the beer will be anyways with two key variables.
- The yeast you are using.
- How much grain you are using.
Using an online calculator like brewers friend you can get the general gist. You just won’t know if you made any mistakes. Since I’ve had beers come in under expectation because of poor milling.
When it comes to yeast you can expect that your beer won’t go past a certain level, since the yeast will die if alcohol percentage gets too high.
1 Gallon Fermentation Glass Carboy
These things are cheap, I mean real cheap. I mean you can look in a dumpster and find it. DO NOT DO THIS!
I was at my local grocery store and I saw they sold organic apple juice in these things, which means you might have one leftover, or maybe a neighbor who uses them.
At the very least you can just buy a few on amazon for around 10 bucks. But I mean hey that apple juice was 10 bucks anyways so you might as well enjoy the juice.
You might as well turn that juice into alcohol while you are at it. Check out one of my favorite finance bloggers making some cider.
Bottle Caps and Capper
You probably don’t have a kegging system and those things are expensive so you will need to go the cheaper route and that is to bottle your beer.
You will need to get the manual hand bottle capper since its the cheapest one. You can also get a ton of bottle caps if you buy it together on Amazon.
An alternative and around the same price is just to buy the swing-top bottles to bottle in. They are reusable and if you drank a beer or mead in one you can just use one it came in.
Note: You will need the darker swing top bottles to prevent beer and hop spoilage.
Airlock and Bung
I know! I’m sorry but I really just suggest buying this, I mean its 5 bucks for two on Amazon. Are you really that cheap?
OK fine, if you really are that cheap just follow this guys directions to make an airlock if you happen to have some silicone tubing by chance.
Bottling Wand
This part is either absolutely necessary of maybe only partially necessary. Depending on how steady your hand is or if you are a crazy person.
You could attempt to use a funnel to get the homebrew into the bottles but the wand just makes it so much easier. Either way its up to you, skip it at your own risk. I mean you don’t want to spill any do you?
Save Money on Ingredients
You are going to need ingredients to make beer, and I can tell you I’m sorry, you will probably need to buy these. Unless your already farming hops and barley.
For this step you need to make your beer simple. Only brew with the fewest ingredients you possibly can.
This is what you will need.
- Malt from grain or extract
- Hops
- Table Sugar
- Spices you have collecting dust
- Water
- Yeast
Getting the Malt
The cheapest way to brew is to use only one base grain. That way you only have to spend money on one grain. This will also allow you to buy a bit more bulk in order to satisfy lower price points.
This can be done pretty easily too. I talk about this in brewing a Belgian tripel article.
Alternatively you could just buy extract and this will actually save you some cash on buying a mesh bag to hold the grain while utilizing the brew in the bag method.
You can actually find some pretty good deals on extract, especially if they are nearing expiration.
The reason I suggest using extract at this point is merely because you are buying grain in such low volumes. These low volumes essentially make extract brewing almost the same price point.
I say almost because it can fluctuate from one to the other, depending on the kind that you purchase.
Hops are Expensive so Buy Very Little
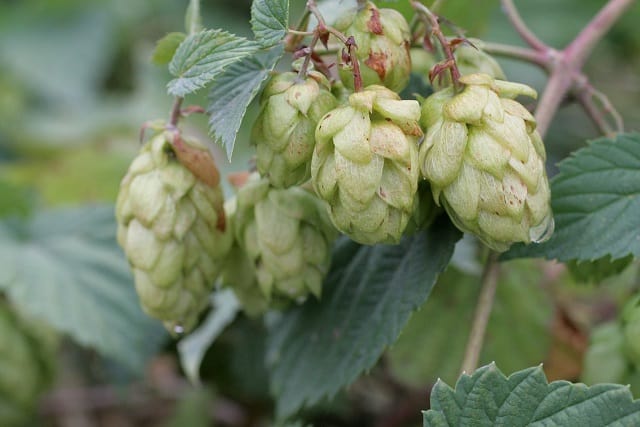
Unless you are fortunate enough to live in the Pacific Northwest, you are likely out of luck when it comes to growing your own hops for brewing so we will have to skimp on these to keep things cheap.
You only want to buy what you absolutely need and the smallest quantity you can. This will likely be 1 oz from your homebrew supply store. Unless of course you are planning to brew more than one gallon, if that is the case buy in bulk.
Find the cheapest hop you can find, it doesn’t even matter which one, just use it to bitter, and if you are lucky it might be a good flavor and aroma too.
Table Sugar
Table sugar can serve two purposes.
- Add fermentables to the wort, like in a Belgian tripel.
- Priming sugar for carbonation.
When using table sugar as a priming agent it won’t affect the flavor of beer so feel free to carbonate to your hearts content.
If you are adding it as a fermentable sugar. It’s really up to your yeast to do the work in flavoring the beer.
Spices Collecting Dust
You don’t need to do this step and if you don’t have any or want to use any you can skip this step.
But you can make some pretty interesting beers using spices. Check out my massive spice article for some inspiration.
A common spice to use in beer is clove, but you can also use cocoa nibs for a darker beer.
Yes cocoa, is considered a spice I checked!
Water
Water takes up the majority of the beer. So it makes sense to have great water right?
Yes. The answer is yes. But you could use tap water if you like, its not gonna hurt you. I would also recommend you use cheap ice water to cool the wort in the sink.
So if you have no way of getting cheap filtered water just use tap water. Otherwise use filtered water as your next alternative.
Check out my article about brewing water to learn more about water and beer.
Yeast
This could have the potential to be the most expensive ingredient. That is if you are getting those darn expensive liquid yeasts.
In fact we could just use some leftover bread yeast since I’m sure you have a lot of that lying around. Although that is a terrible idea, and shame on you.
The next best alternative is the cheap dry beer yeast. something like Safale American Ale Yeast.
You don’t even have to make a starter for dry yeast anymore which makes it even better to use! So its cheaper and easier to use!
Can a Kit Be More Economical?
Unless you are sourcing your equipment from Craigslist, which is actually a viable option. Kits can make sense sometimes. Especially ingredient kits.
So, there are two parts to brewing a beer, one is buying the equipment and the other is the ingredients.
When we talk about kits we talk about both, kits will often have the issue of giving you overlapping equipment, which you wont need more of. Kit’s can also include only ingredients.
How did we do making our own Kit
Lets take a look at some kit comparisons to what we spend buying individual items. First lets see how much we spent ourselves on equipment.
| Equipment | Price |
|---|---|
| Bottle Caps and Bottle Capper | ~$20 |
| Glass Carboy Airlock and Bung | ~$12 |
| Mesh Bag for Brewing | ~$10 |
| Bottling Wand | ~$16 |
| Total Cost | ~$58 |
Now lets look at the cost of Ingredients.
| Ingredients | Price |
| Grain or Extract | ~$4-6 |
| Hops 1oz | ~$2 |
| Dry Yeast | ~$6 |
| Total Cost | ~$14 |
Based on 1 gallon recipe using MoreBeer!
So with the total cost of Equipment and ingredients we are coming to ~$72. Now keep in mind the equipment costs initial equipment prices, you won’t have to pay these continually.
Overall that’s pretty good and I’m sure we can make it $20 dollars cheaper by just sourcing swing top bottles for free to bring it down to just $52. If you use extract you can maybe ditch the brew bag and bring it to just $42.
The Cost of a Kit that has Everything we Need
Unfortunately I am hard pressed to find a brew kit that is under 42 dollars that has every piece of equipment that we need. Its kind of strange really, I’m not sure how anyone buying these kits can even brew beer.
What they do excel at is offering a recipe alongside the equipment. This brings our total to 56 dollars while most of the kits sit at around 50 dollars off Amazon.
There are some caveats though, since some of the equipment is either smaller, of poorer quality, or nonexistent.
Northern Brewer
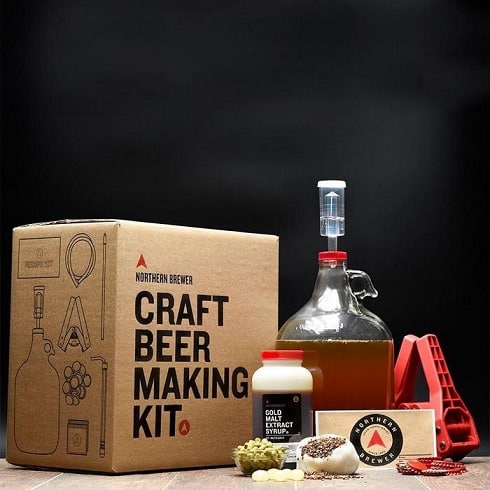
The closest I could find that had nearly every important item that we needed was the northern brewer 1 gallon starter kit.
Unfortunately for the kit, only one item is really useful for moving up in size. That would be the hand bottle capper. The auto-siphon is too small for larger 5 gallon carboys.
If you are using swing top bottles and using extract there is no reason for the mashing bag or the bottle capping, which makes making your own kit even with a few purchases cheaper, and you will get more runway out of the items.
Brooklyn Brew Shop
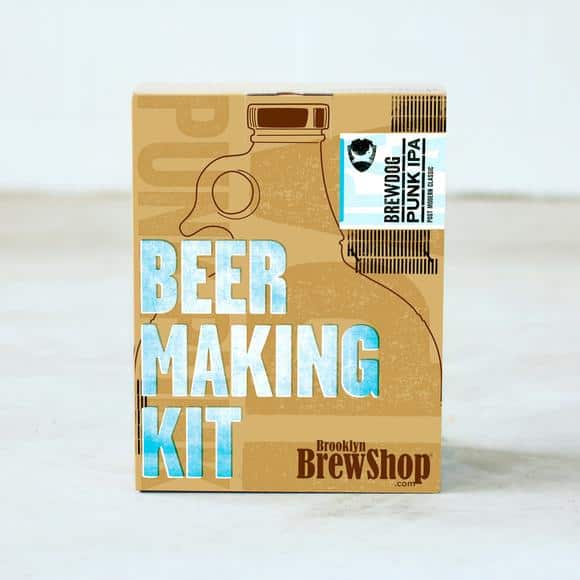
A close second to the best bang for our buck would likely be the Brooklyn Brew Shop 1 gallon kit. Whats nice about this one is you can brew all grain. You also get a hydrometer so you know the alcohol content of you beer.
Overall the only thing you can really use as you upgrade to a larger system would be the hydrometer. Which is useful.
Overall We Did OK
Depending on how much of a die hard you are and what equipment you already have on hand you can put together your own brew kit pretty easily for cheap.
If you wanted to you could get away with just purchasing the ingredients and scavenging for everything else.
Smaller brew kits are fairly throwaway in my opinion and don’t scale well so if you plan on brewing more it might make sense to go with a more premium kit.
It also gives you more flexibility on what you want to brew since brew kits don’t have the full array of possible beers you might want to make.
Check out my recommended gear page for more updated information on what I suggest and currently use.