
I’m sure it’s happened to the best of us. You have made the biggest baddest most wrecked IPA on the planet. Then you take a look at the fermenter with your precious brew inside, and you think is it fermenting properly?
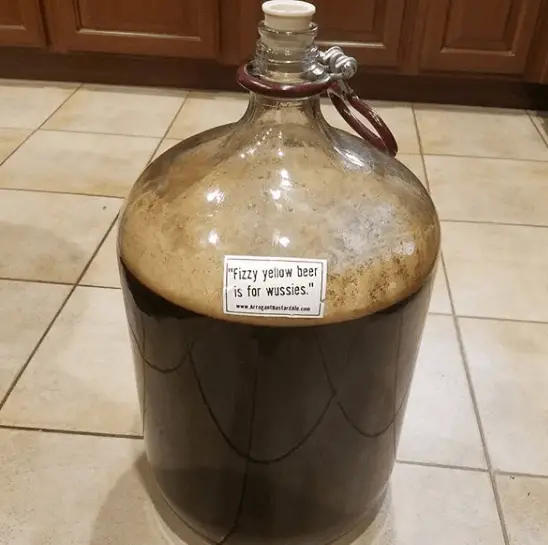
A ring of foamy sludge will form around the top of your fermenting carboy. You may also see some buildup at the bottom of the carboy in excess of normal wheat and hop sediment. The process is most vigorous the first 24 hours and requires a blow off tube for 3 days before switching to a bubbler.
Not all beers take the same amount of time to ferment. Some beers can take longer than the standard two week to ferment fully. So even if you don’t see a thick ring of sludge your beer is likely still fermenting
Fermentation Variables
as a general rule of thumb lighter beers typically take less time to ferment. The reason behind this can be twofold. Either the yeast being used is much more powerful and can withstand higher alcohol contents or there are less sugars in the beer for the yeast to consume.
Sugars
Sugars are essentially food for the yeast. My homebrew buddy hates me for this, but I like to describe this as the food that yeast eats and CO2 what the yeast farts out.
Alcohol is also a byproduct of the yeast eating the sugars. Alcohol is mainly more of the solid version of the waste. The higher alcohol the beer contains the more of its own waste the yeast is sitting in. This as you can imagine creates problems kills off the yeast in the process.
Yeast
Yeast strains are different for each style of beer brewed. If you were to brew a beer that has a higher alcohol content you will need a yeast that can live in higher levels of alcohol before it dies off.
There can be a lot of sugars left in the beer if a weak strain of yeast is used for a high alcohol content beer. The higher sugar content could leave your beer with a dryer taste.
You will need to make sure your yeast is healthy before tossing it in to the wort. You can do this by making a starter, the starter basically grows the number of yeast cells before you add it to the beer. This can give your yeast a head start against the massive wall of sugar it will be up against.
Hops
Hops shouldn’t affect the alcohol content of your beer but if you are brewing a hoppy IPA things can get messy. You will tend to see a larger ring of scum around the top of the carboy.
This is a result of the fermentation taking place and the beer foaming up where the excess space is. Because of the large amount of hops in the beer it has a lot of extra sediment that tends to create a much more massive ring around the top of the caryboy.
Don’t worry if you are working on a low hop beer and don’t see a lot of scum around the top. You’re beer is not fermenting any less vigorously it just has less crap in it.
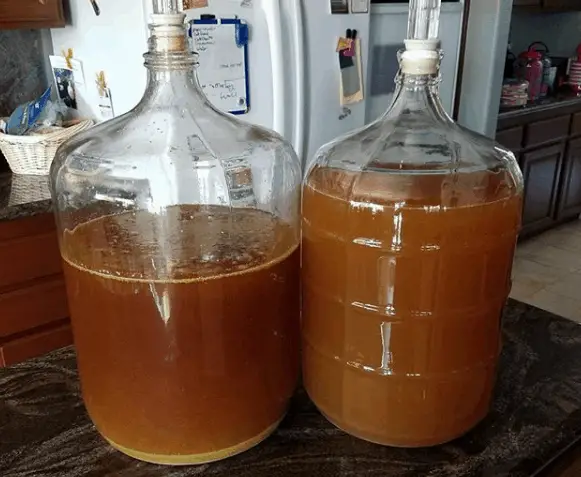
First and Second Fermentation
Secondary fermentation likely won’t be the same as primary although it can depend on what you are doing for secondary fermentation.
You don’t want much yeast in your secondary if any. The point of secondary is not really to increase the amount of alcohol in your beer but instead to clarify the beer and let it settle.
Basically you will see a huge amount of sediment and dead yeast at the bottom of your carboy after primary fermentation. You don’t want this yeast in the beer, so moving it to secondary will get the beer clearer as more yeast goes dormant and settles at the bottom in secondary.
If you don’t plan on bottle conditioning you can heat the yeast or freeze it to completely kill it off and stop the gravity.
There will be much less yeast accumulating at the bottom of your secondary.
Secondary is also the opportunity to add fruit or dry hop your beer. You will want to do this in secondary so that the yeast activity will have less impact on the aroma and flavor of the beer.
Take a reading to see if its finished fermenting
When moving from primary fermentation to secondary you will want to take a hydrometer reading. This will let you know approximately what your alcohol content will be. It will also give you the chance to see if your beer has fermented.
You can tell if something went wrong if your hydrometer is essentially reading near the same to what it was before you put the beer in the fermenter.
If something went wrong this might be an opportunity for you to re-pitch the yeast. This could essentially save an otherwise non alcoholic beer.
Blow off and Bubbler
When you are entering your primary fermentation it is probably wise to use a blow off tube. Especially if you are making something that has a lot of sediment or other radicals.
A blow off is essentially a rubber stopper with a hole in it. You can put the clear transfer tube from the stopper and run it into an old milk bottle. That way any excess can go straight into the milk bottle instead of remix into your beer.
The bubble will then be added once fermentation has slowed down. It will allow the CO2 to escape out and not let in any oxygen. Remember as soon as your beer gets oxygenated it has a higher chance of have off flavors. You may also get wild yeast in your beer if its open to the air.
When Fermentation is Complete
I generally wait a week before I decide whether to switch to secondary or wait one more week if I want to straight bottle it. There is no hard or fast rule to know when it is really done fermenting other than checking gravity or just looking at the beer.
If you look at the beer and it has settled down, then it is likely the yeast is not active. If you want your beer to be more clear especially after secondary fermentation you will need to wait until it settles enough and looks clear to your own standards.
To Bottle or not to Bottle
It’s really up to you on when you want to bottle your beer after secondary. It could take up to two weeks, but you could let it sit even longer. Conditioning beer that has much more alcohol will bring more nuance to the flavors of your home brew.
Alternatively you could just bottle condition your beer. You will be able to drink delicious carbonated beer and test it out at different stages of its life. This is what we like to do. Since otherwise we would have to go to the store and buy expensive beer… gross.
Bottling is actually another stage of fermentation. Remember earlier how I said CO2 is farted out? Well CO2 is also how beer is carbonated. The way you do this in the bottle is to add a bit of priming sugar.
After two weeks the beer should be carbonated and ready to go. This method does leave a bit of yeast cake at the bottom of the beer so don’t pour the entire bottle, or drink it all. It won’t hurt you.
Stuck Fermentation
Stuck fermentation takes place if your beer had started fermentation and then stopped.
There are a few reasons your beer could have begun fermentation and then essentially got stuck. One of the reasons might be there was a low cell count and the yeast was not able to access all the available sugars.
One reason for this might be the low level of nitrogen in the wort or beer. Nitrogen is a growth aid to the yeast and if the yeast doesnt have enough available nutrients it may not take off enough to eat all the sugars.
Some yeasts might not be able to tolerate higher levels of alcohol content. If you are using weaker strains than this may be a reason it has leveled off.
When it comes to yeast nutrients if you get stuck fermentation then adding fruit to secondary could restart the fermentation process. This might result in less of the flavor and aroma that was trying to be achieved.